Yormandi Boss Fight - Complete Guide
🧭 Getting There
-
The Yormandi fight takes place beneath the Onyx Facility (Site B) in a new excavation zone under the main building.
-
There is no official mission/contract yet — you must navigate manually to reach it.
-
The arena is sealed once entered; you can’t re-enter if downed or if the airlock cycles.
⚙️ Preparation & Load-Out
-
Recommended gear:
-
FS9 rifle with plenty of ammo
-
P6-LR or equivalent secondary
-
Healing gear — you’ll need to heal immediately after taking damage
-
-
Works best as a duo; solo is possible but riskier.
-
Optional: Plasma battery dispenser near the entrance lets you prep energy cells before pulling the lever — but the creator says it’s “too much faffing about.”
🚨 Arena Activation
-
Drop to the lever on the left side of the airlock.
-
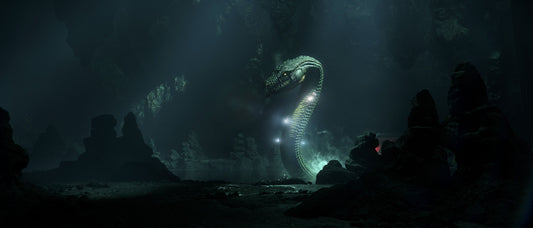
Pull the lever — this locks the arena and summons the Yormandi (“Sparky”).
-
The creature emerges from one of three pools.
🧩 Weak Spots & Damage Phases
-
The Yormandi has eight glowing weak spots along its body.
-
You’ll know you’re hitting one when you hear a “squelching noise” and see splashing visuals.
-
It also has a temporary weak point inside the mouth during its spit attack — shooting inside counts as a “quasi weak spot.”
⚔️ Attack Patterns
| Attack | Description | Counter |
|---|---|---|
| Plasma Overcharge | Electrifies rocks and terrain, causing AoE damage. | Avoid staying near glowing/charged rocks. |
| Smash Down | Yormandi slams the ground or cover objects. | Keep moving; don’t stay behind the same cover too long. |
| Lightning-Fast Bite | A close-range strike that can instantly down solo players. | Maintain distance; use pillars or crates. |
| Spit Attack | Shoots plasma/acid projectiles; exposes inner mouth. | Aim inside the mouth for bonus damage. |
| AoE Shockwave | Circular ground blast triggered when second worm appears. | Go prone to avoid it completely. |
🔫 Combat Strategy
-
Engage from cover, but beware — many formerly safe spots now have invisible collision zones that prevent hiding.
-
Focus fire on head weak spots whenever possible.
-
Heal instantly after taking damage; waiting can result in being one-shot by follow-up attacks.
-
Maintain constant movement and reposition frequently.
🪱 Phase 2 — Twin Worms
-
After dealing significant damage to the first Yormandi, a second one spawns.
-
Plasma attack intensity increases:
-
More frequent beams
-
Stronger AoE blasts
-
-
Continue focusing on head weak points and mouth shots during spit attacks.
-
Dodging tip: go prone to evade the AoE wave completely.
💀 Death & Reset Rules
-
If you’re downed, you cannot re-enter — the airlock seals.
-
After killing both worms, the reset mechanic works properly (arena reopens after completion).
-
Beware of amber flashing lights — that’s the “kill wave” which will wipe the area (and destroy loot).
💰 Rewards
-
When both are dead, they’ll flop their heads onto the path.
-
You can extract the tongue and eyes from each corpse.
-
These are used for trading with Wikelo, currently the only vendor selling binoculars in this build.
🧠 Summary of Key Tactics
-
Prep ammo → pull lever → fight begins.
-
Hit glowing weak points — sound and splash confirm damage.
-
During spit attack → shoot into mouth.
-
Go prone to avoid AoE.
-
Heal fast and keep moving.
-
Expect two worms total; the second increases plasma intensity.
-
Extract tongues and eyes post-fight.
-
Exit before amber lights signal the kill wave.


